
iStock
Ever served a dried-out turkey? Wondered how to make your own stock instead of using store-bought? Longed to break in that unused wok? Lucy Waverman is your guiding hand in the kitchen with answers to all your questions on cooking techniques. If you have a question you don’t see covered here, send it by e-mail. And read more Globe and Mail guides to kitchen life.
What tools do you really need in the kitchen – and which can you do without?
The essential guide to understanding the ingredients in your kitchen
Great entertaining: All your hosting questions answered
Read more of The Globe’s guides to living well, from wine etiquette to budget travel
What are three basic dishes everyone should be able to cook?
I was reading an article recently about “adulting,” a fashionable term for helping millennials become more productive adults. There are classes, books and lectures on topics that range from cooking to changing a tire.
A reader’s question illustrates this idea of growing up competently: What are three basic meals every person should be able to make for themselves and/or their family?

rez-art/iStockphoto
Here are my basics – and they are still some of my favourite dishes. Once you master them, all sorts of possibilities open up that will allow you to go further with your cooking. They are an omelette, roast chicken and a basic stir-fry.
An omelette is incredibly versatile. It can be served for breakfast, lunch or dinner. Grate a little cheese into it, or incorporate some leftover bacon, prosciutto or roasted vegetables into the filling. You’ll need a 7- or 8-inch non-stick frying pan for the best result. Creamy, French-style omelettes taste best. The web is full of tips for making omelettes, so look up a video and learn to make yours.
Roast chicken can feed your family and friends, it makes great leftovers and is easy on the budget. Buy a free-range, air-chilled chicken (organic is good but more expensive). Rub the skin with butter and seasonings, such as rosemary, garlic, lemon zest or tarragon, place on a rack in a roasting pan or in a large skillet, and roast at 400 F (200 C) for an hour or so, until the internal temperature reaches 160 F and the juices are clear. You can place chopped potatoes, onions and root veggies around the chicken and they will cook at the same time. If you want, throw in a green vegetable about 15 minutes before the chicken finishes cooking. Versatile and delicious, this meal will make your reputation soar.
A stir-fry is the perfect technique for using up bits and pieces in your refrigerator. Heat oil (olive or vegetable) in a skillet or wok over high heat. Add some seasonings, such as garlic, onion, chilies or ginger, and toss together, then add a protein, if using. Give it a few turns, then toss in your choice of vegetables, cut in equal sizes for even cooking. Make it spicy with Sriracha or cool with herbs. Toss for about five minutes, then add a seasoning liquid, such as soy sauce, stock, tomato sauce or coconut milk. A finished dish. You can spoon it over rice, grains or noodles.
Each of these dishes has endless variations to play around with. Once you’ve mastered them, you will graduate to adulthood whatever your age.
What are some tricks for quick dinners?
Crunch time in the kitchen? Here are some organizational and planning tips to ensure everyone eats as well as possible.
Make enough salad dressing to last the whole week. Quadruple quantities of oil, vinegar and mustard and mix in a blender (or with a hand blender). Store the dressing in the refrigerator, but remember to take it out half an hour before using, as oil thickens when chilled. Add other flavourings when needed, such as garlic, soy, maple syrup, honey, herbs and spices, to diversify the dressing’s taste.

unsplash/unsplash
Tray baking is one of the fastest and easiest methods to get dinner on the table. Use a large baking tray and line it with parchment for easier cleanup. I cut up the vegetables and the protein into smaller sizes, so they take less time to cook, toss with oil and seasonings then tumble it all onto a tray. If you like your chicken breasts or pork chops whole, cut the vegetables a little bigger. Preheat the oven to 400 F (200 C) and start baking. Here are some timing guides: Salmon, 12 to 14 minutes. Thinner fish, about 7 minutes. Boneless chicken breasts and thighs, about 20 to 25 minutes; on the bone, 10 minutes longer. Lamb and pork chops, 25 minutes. Potatoes, cut up, about 20 to 25 minutes. When everything is ready, toss on a platter to serve. Remember to use lots of veggies for health and colour. And throw on a few tomato slices, which melt to give a little sauce.
There is nothing wrong with having a sandwich supper. Baguette with cheese, tomatoes and cold meat with a store-bought pesto is a great meal with a bowl of soup.
Make twice as much rice or noodles for a stir-fry, save half and make bowls for supper the next night using leftover veggies, fish or chicken.
If you want soup, whiz leftovers in the blender with chicken stock, or cook a side of beans and lentils, making enough for a soup the next day.
Cook twice as much and freeze half in freezer bags, making sure to press out the air. The freezer is your friend; don’t forget to label and date things before putting them in the freezer.
Make a large lasagna or other baked pasta on the weekend and have it twice. One-pot pasta is easy to make – and clean up. Cook pasta in a large pot, drain, return to pot and add in the sauce’s ingredients.
Use a meal service once or twice a week. Some send fresh ingredients that are prepped for cooking, along with the recipe – even the kids can prepare it – while others provide an entirely cooked meal with reheating instructions. Dinner is served.
What’s the easiest method to make stock?
Making stock is one of the cheapest and most satisfying culinary techniques. Essentially it is a nourishing, flavoured liquid that adds body and soul to other dishes.
My mother always had a stockpot bubbling away on the stove, which she fed daily with bones from the roast, the ends of onions, pieces of tomatoes and other bits and bobs. Her kitchen always smelled fantastic. Unfortunately, not many people make stock today, thinking it is time-consuming. Instead, they rely on processed, salty, MSG-filled bouillon cubes or tasteless boxed chicken stocks.

iStock
But there are so many reasons to make stock: It is not time-consuming – it takes five minutes to assemble and then five hours to leave alone. It contains no additives or salt. It is the basis for tasty soups. When reduced, it gives a full-flavoured zest to sauces. It enhances the essence of stews. And some even say it cures the common cold (Jewish penicillin).
Chicken stock is versatile and can pass for beef in most applications. Buy chicken bones – backs and necks are good – and throw in a couple of legs for extra flavour (they taste good later in a chicken sandwich). Cover the bones with cold water, bring to a boil and skim off the greyish scum, which is the albumin in the bones.
Add vegetables such as onions, carrots, celery, mushroom stalks and leeks. Don’t add salt or pepper. Simmer for four to six hours until flavourful. If you continue to cook very gently for about 18 hours, it becomes trendy bone broth. Strain and cool. You can freeze the stock, but it will last for five to six days in the refrigerator if you don’t remove the layer of fat that rises to the surface.
Vegetable stock is another winner; you can reduce food waste by bagging all your veggie ends, even potato peels, and freezing them until you have filled a large plastic freezer bag. Cover the scraps with water and simmer for a few hours. Lots of nourishment and it costs you nothing.
If you don’t want to make your own stock, your best alternative is to buy it from your butcher (make sure it is unsalted). For an on-hand substitute, try Better than Bouillon, which is available at places such as Fiesta Farms in Toronto. Keep this in the refrigerator for whenever you need a flavour boost.
How do I make a good pot of soup?
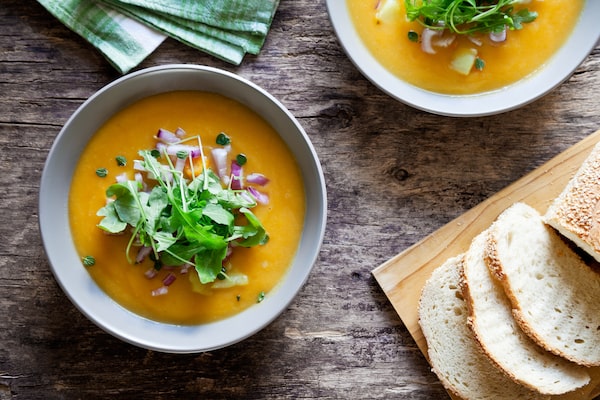
From creamy vegetable soups to thick, rich, meaty one-pot dinners, soups are an art, and an easy one to master. You don’t need a recipe – you just need to look in your refrigerator.
Just about anything edible can be turned into soup. Think a handful of carrots and other root vegetables simmered with some curry powder and finished with cream or coconut milk, a few elderly zucchini spiked with apples and watercress, or leftover meat or sausages combined with canned white beans and canned tomatoes. Soup requires only imagination and some basics.
iStock
The one thing good soups have in common is flavourful stock – whether it is vegetable, chicken or beef. Buy low-sodium stock in Tetra Paks, “Better than Bouillon” stock pastes in jars or make your own. Stock enriches and develops the taste of soup. For tomato-based soups, use puréed canned tomatoes (preferably San Marzano) or passata (the Italian tomato purée available in bottles at the supermarket) as the stock. I thin down the tomato base with some vegetable stock (usually about 2 cups). When you want a creamy soup, do not use milk as a stock, as it will curdle when boiled. Much better to use some chicken stock and add whipping cream at the end. If your soup is not thick enough, blend a portion and stir it back in. No flavour change but the right texture.
Soups fall into different categories. Creamy soups are an elegant option for a dinner party or a good use for leftover vegetables. Hearty one-pot soups, full of vegetables and meat, are perfect with some grainy sourdough bread for winter dinners. However, the basics are always the same.
Cut your vegetables the same size so they cook as evenly as possible. Have some aromatics on hand, such as chopped onion, leeks or garlic. Sauté your aromatics and vegetables in butter or olive oil, then add seasonings such as garlic, herbs and spices. Add your stock and simmer – don’t boil – until the vegetables are cooked but not mushy. Overcooking tends to weaken the flavour. If you are making a creamy soup, remember to add some uncooked chopped potato (about 1 cup of potato per 4 cups of liquid) at the beginning to act as a thickener when blended.
Once the vegetables are cooked, either purée or add rinsed canned beans, cooked pasta, cooked meat, sausage or fish, and simmer together until hot. It’s best to add these cooked ingredients, particularly pasta, near the end. Pasta or rice absorbs too much broth if added uncooked. If you want a creamy soup, use a lesser amount of whipping cream, rather than table or 18 per cent, as it will not curdle when boiled.
If your soup tastes bland, here are some ideas to perk it up. Salt improves a lacklustre flavour. Freshly ground pepper adds spice. A little tomato paste adds body, especially to tomato-based soups. A pinch or two of curry powder gives a background flavour. A few drops of lemon or lime juice will make your soup livelier. Herbs always help, as do soup garnishes.
In restaurants, the garnish may be so elaborate that it takes over the soup. I like to keep it simple with additions such as swirled yogurt or sour cream, a few drops of chili oil or a dusting of herbs. Mix some pesto (try using carrot tops for carrot soup and arugula for green soups) with sour or sweet cream and drizzle it around the soup. Stir fry a piece of the vegetable used in the soup and plop it on top. This is especially nice with cream soups to let diners know what kind of soup it is.
Most soups freeze well, as do leftover raw vegetables for making soup later. Soup is a healthy addition to any meal and can help to reduce food waste.
How do I properly roast meat?
Nothing beats the mouth-watering smell of a juicy roast in the oven. It is the symbol of special occasions and family celebrations. Today, buying a larger roast is an investment. If you are going to spend the money, it is worth knowing how to cook it properly. Although I am talking specifically about beef in these tips, the methods work for any large piece of meat.
A prime rib or rib roast is the first seven bones of the cow’s rib section. The first cut, or first bone, has more of the central eye of the meat and less of the fattier cap, although I love the taste of the fattier section. The meat is flavourful and succulent and the bonus is the bones, eaten out of hand or coated with marinade and grilled the next day. A porterhouse roast, which is an overgrown T-bone steak, gives a bonus of a piece of filet when you carve it.

alle12/ISTOCK
Buy the best quality meat you can afford. Look for one of these qualifiers: raised without antibiotics, naturally raised, grass-fed, Canadian Prime or AAA. It makes the difference between taste and tasteless.
Best results are obtained with a mixture of high and medium heat for most good cuts. The low-heat method, popular at the moment, is gentle on fibres and is best for tougher cuts, but I find it never has the umami taste of the high-heat roasting method.
Always roast your meat on a rack in a roasting pan. This allows the heat to circulate, browning the underside of the meat as well as the top. Never cover a roast with a lid or foil. It produces steam and the meat will have a dull colour and lacklustre taste.
When cooked, place the roast on a carving board. Let rest for 10 minutes to allow the juices to retract before carving.
Although not quite foolproof, a roast’s cooking time can be estimated by weight. Using the ratio of 15 minutes per pound for rare plus an extra 15 minutes tacked on at the end, or 20 minutes for medium-rare plus 20 minutes, you can usually get exactly what you want. Roast at 450 F for 30 minutes. Turn the heat down to 350 F for the remainder of the time. Use an instant-read thermometer to confirm when your meat is cooked. Stick the thermometer into the fleshiest part and cook to 125 F for rare, 140 F for medium-rare and 160 F for well-done. If your roast is too rare and you are out of time, slide the undercooked slices into the gravy for a couple of minutes to cook a little more.
And gravy? Here is the old-fashioned method that works every time. Remove all but 2 tablespoons of fat from the roasting pan. Place pan over a burner on medium heat and sprinkle in 2 tablespoons flour. Stirring constantly, cook until the flour is browned. Add 3 cups stock (chicken, beef or veal, homemade or store-bought) and a squeeze of tomato paste for richness. Bring to a boil, stirring, then simmer for 5 minutes or until thickened and the flour taste has disappeared. Season and add any meat juices sitting on the board.
Lastly, my mother’s secret to a successful roast: Broil the top of the roast for 5 minutes before cooking or until the fat is crisp. It makes all the difference.
How do I grill with skill?
When it comes to buying a barbecue, gas or charcoal is a personal choice. Each has advantages, but gas is easier. You don’t need all the bells and whistles, such as infrared burners, unless you intend to make this your career, but a barbecue with at least three burners will serve you well.
There are many gadgets for the grill, but ones that I find indispensable are long-handled tools to make turning the food easier, an excellent brush for cleaning the grates, a basting brush and a thermometer (the Thermapen has served me well). For veggies, a grill pan or griddle is very handy, and All-Clad makes several good ones.

Radovan
Time to cook? Marinate your meat, poultry or fish outside of the refrigerator for up to an hour. Longer marinating should be done under refrigeration. And let your protein come to room temperature for more even cooking.
Always oil the grill or the food before cooking to prevent sticking, and preheat the barbecue and grill with the lid down for faster cooking. When the lid is closed, the barbecue acts like an oven as well as a grill, cooking foods more quickly.
Tender cuts of beef, lamb and pork are wonderful on the grill and need no embellishment. Meat that is tough should be marinated and only cooked to medium-rare. Chicken is tricky because the skin tends to burn – use medium heat and turn off one of the burners after the chicken is seared. Place the poultry on the turned-off side of the grill, skin-side up, and finish cooking. This is cooking by indirect heat.
Fish on the bone is another winner. The bones help the fish to cook quickly and they make it easier to turn. Best to buy a fish basket or a grill pan with open holes if you barbecue a lot of fish. Always cook fish fillets, such as salmon, with the skin on – the skin helps hold the fish together and can be removed afterward, if desired.
Vegetables should be sliced the same size for even cooking. All vegetables can be grilled, even ones you may not expect. Radicchio, Brussels sprouts and green beans are delicious grilled simply with a little olive oil in a vegetable basket or open-holed grill pan.
And remember to keep an eye on the food in case of flare-ups if the fat catches fire. Keep a spray bottle of water handy to put out the flames.
A final note: Barbecue maestro Steven Raichlen’s cookbook Project Fire, published by Workman, is an indispensable guide to all things grilled.
What’s the best way to grill a steak indoors?
I really start to crave a thick, juicy steak when the cold weather hits, and this time-tested way of pan roasting is the perfect method when you don’t want to fire up the barbecue. Chefs have always relied on this technique for cooking meat, poultry or fish, and it is a perfect hack for home cooks. You need a heavy frying pan; cast iron is the best, but not necessary. Don’t use non-stick, as it can’t be heated high enough.
Have your steak ready. The best cuts are premium: ribs steaks, rib eye or New York sirloin, although I have used this method with flank steak. Let the meat come to room temperature, then season generously on both sides with salt and freshly cracked pepper.

iStock
Preheat your oven to 450 F (220 C). Heat your heavy pan for 1 to 2 minutes over high heat, then add 1 tablespoon vegetable or olive oil. Don’t use butter – it will burn. Add the steaks, but do not crowd the pan. Sear for 1 to 2 minutes on each side, or until browned. Place the pan in the oven, or, if you’re cooking more than a couple of steaks, heat a baking sheet for 10 minutes in the hot oven and then plunk the steaks on to it. Bake for 5 to 12 minutes depending on the thickness of the meat and the desired degree of doneness. A one-inch steak usually takes 5 minutes, but gorgeous 2-inch beauties, my favourites, take about 10 minutes for medium-rare.
Remove to a carving board and let sit for 5 minutes or so. Slice the steak into pieces or serve whole, sprinkling with some Maldon salt. Some people (not me, I am a purist) like to drizzle melted butter on top.
Thicker cuts work better than thinner ones, but everything from chicken breasts to beef filet tastes better when cooked using this method. The reason? It seals in the juices.
Sauces are often made in the skillet afterward, as the brown bits at the bottom of the pan make an excellent base (another reason to avoid non-stick). Add a liquid of your choice, like beef or chicken stock or wine with herbs, until the volume is reduced, and then finish with a pat of butter or a dollop of cream.
One great benefit is that you can do the searing early on and bake the steaks when needed, adding a minute or two of cooking time because the steaks will have cooled.
One caution: When you remove the skillet from the oven, keep the handle covered with a cloth or oven mitt to avoid burning yourself.
How do I make fried chicken?
My introduction to real fried chicken came from fine Southern cook Nathalie Dupree, who fried her chicken in shortening in an electric frying pan. She maintained that shortening made the crispiest chicken and hers was succulent. But when did we last use shortening or see an electric frying pan?
Through trial and error and a fried-chicken-loving family, I have developed a set of rules that makes for amazing Southern fried chicken.

istock
I use canola, sunflower or grapeseed oil. Peanut is excellent but expensive. Never fry in olive oil; the smoke point is lower than for other oils.
My preference for ease of cooking and serving is to deep-fry the chicken most of the way through earlier in the day. I leave it on a rack, refrigerated if for more than an hour, then finish cooking it in a 350 F oven for 20 to 25 minutes. It’s not authentic, but it is very good.
Bone-in chicken works, but it is harder to eat, so I often use skinless, boneless thighs. Breasts tend to dry out, so unless you have a white-meat fanatic, I would avoid them.
I marinate my chicken overnight in buttermilk flavoured with spices and/or herbs. The spices can be hot or mild, while the herbs are really your personal preference.
Some people like to dip the chicken in flour, egg and panko or bread crumbs, but I find this too heavy. Instead, for a crispy coating, I like to combine flour and cornstarch (or rice flour) in a 4 to 1 ratio; 1 cup flour to ¼ cup cornstarch. This lightens the batter by removing some gluten. Always season the flour with salt and pepper.
Preheat your oil to 350 F in a wok, deep saucepan or deep fryer. A laser thermometer is a handy tool for checking the oil temperature; these can be found in the automotive department of Canadian Tire and recently Loblaws. It hovers above the oil and uses laser technology to give you a reading of the heat.
I find it easiest to place the flour mixture in a plastic bag, then toss the chicken pieces until they are well coated. Remove them with tongs and shake off any excess flour. Slide the chicken pieces into the hot oil and cook for 7 to 10 minutes, or until the juices are clear and they are nicely browned. If you want to finish them in the oven, fry for 5 minutes then place on a rack to cool before baking in a 350 F oven for 20 to 25 minutes.
Korean chicken, which is having a moment, is the ultimate fried chicken for some. It is coated with a thin batter of cornstarch mixed with water. Years ago, Heston Blumenthal, of Fat Duck fame, replaced half the water with vodka and made a superb batter. The reason? Unlike water, vodka inhibits the development of gluten, which means you’ll end up with a light batter, instead of one that’s doughy. For my Korean chicken, I dip it in cornstarch mixed with salt and a touch of baking powder, then add equal parts water and vodka to the remaining flour mixture to make a thin batter. Dip the chicken again and deep-fry. I then cool and deep-fry quickly a second time before serving. The batter shatters upon biting into it. Delicious!
What’s an easy method to brine a turkey?
People, it seems, are scared to cook turkey, remembering past meals of overcooked, dry meat. Today, we turn to brining and a short cook time to give us the perfect bird.
There are two kinds of brining: wet and dry.
Wet brining involves submerging your turkey in litres of heavily salted water. I never wet brine because the turkey absorbs some of the liquid during the process, making the juices watery. Plus, you need to empty out your refrigerator to make room for such a large container of brining turkey.

Lucy Waverman
Dry brining is my go-to solution – for turkeys (even just turkey breasts) and all other poultry. With a dry brine, the salt interacts by osmosis with the turkey juices to create a strong natural brine. This equals juiciness, tenderness and flavour.
Here are a few tips to get you started:
- Use Diamond Kosher salt for brining. Its texture and flakiness are best for absorption. If you use table salt, cut the amount in half.
- The ratio I prefer is 1 tbsp (15 ml) Kosher salt to every 4 pounds (2 kilograms) of turkey.
- Mixing 1/2 tsp baking powder in with the salt makes the skin crispier.
- Herbs give another level of flavour. Add rosemary, grated lemon zest, tarragon, paprika or whatever else you like.
- Liberally salt the bird inside and out and refrigerate, uncovered, for one to two days. Then, pat the turkey dry but do not rinse. Because the bird absorbs about 1 tbsp of the salt mixture during this process, do not salt before roasting.
- Kosher turkeys are prebrined, by Jewish laws, to remove all the blood. If you want a brined turkey but cannot be bothered to do it yourself, this is the perfect solution.
To make sure your turkey is perfection, use the high-heat method. Start at 400 F. Roast for 15 minutes per pound for the first 10 pounds, and then 7 minutes per pound for each successive one, turning the heat down to 375 F after one hour. (A 14-pound turkey, for example, will cook for 150 minutes for the first 10 pounds (10 x 15 minutes) and 28 minutes for the last 4 pounds (4 x 7 minutes), giving a total cooking time of about three hours. For stuffing, add an extra 15 minutes.)
Roast it on a rack so that air circulates around the bird. If the skin is browning too much, brush butter or turkey drippings onto cheesecloth or parchment paper, and lay it over the skin for the last hour. Never cover with foil or you will get a steamed bird.
Good technique takes the terror out of cooking your holiday dinner.
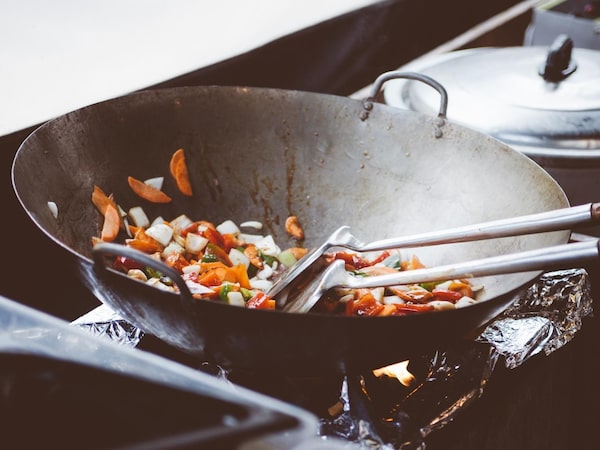
How do I master a stir fry?
A stir-fry is a great way to whip up a quick and healthy meal. It is also adaptable, letting you use up bits and pieces from the fridge – any fresh vegetables that are hanging about, along with small quantities of meat, fish or legumes, and that little dab of sauce or salsa left over from dinner.
Successful stir-frying is all about technique. Like sautéing, stir-frying means tossing small, even-sized pieces of food quickly in hot oil. This method, which cooks the ingredients but does not necessarily brown them, can be adapted for all kinds of fast cooking.
Clem Onejeghuo/Unsplash Imagery
A wok is the preferred cooking vessel for stir-frying. Its round bottom and high sides mean that heat is evenly distributed, and food will not fly out when tossed. Carbon steel woks are more efficient than ones made of stainless steel, because stainless steel is not a porous metal, so food will stick in it. If you don’t have a wok, use a heavy frying pan (cast iron is excellent), but not nonstick as it can’t be heated high enough and sauces will not combine together properly.
Organization is key to a successful stir-fry. Have all the meat and vegetables ready to go before starting to cook. They should be cut to the same size and shape for even cooking and eye appeal. If your protein is raw, a quick marinade with a little soy sauce, ginger, garlic or herbs and olive oil will add extra flavour.
Always use the highest heat setting to cook quickly without burning. To help keep the food from sticking, heat the wok before adding any oil. To properly sear the proteins, the oil should be hot enough to smoke.
Start by seasoning the oil with onions, garlic, ginger or spices to give lots of flavour. Cook only long enough to sizzle, about 30 seconds; you don’t want them to burn. Remove the meat from the marinade and add it to the hot oil. Toss until the pinkness disappears. Remove and reserve so as not to overcook or crowd the wok.
Next, stir-fry the vegetables, then return the meat and add the final seasoning sauce. This can be Asian (soy, ginger, oil, oyster sauce, sriracha), Spanish (peppers, tomatoes, smoked paprika, garlic, saffron), Italian (tomato sauce, basil, olive oil, grated Parmesan), French (wine, stock, herbs, a little butter) or invented by your imagination.
Season well with salt and pepper and, to give it a more layered feeling, scatter over some herbs, nuts or seeds. Finish with a sprinkle of rice, balsamic or apple cider vinegar, which heightens flavour.
Once you’ve gathered your ingredients, you’ll have a mouthwatering meal on the table in 15 minutes. Easy peasy.
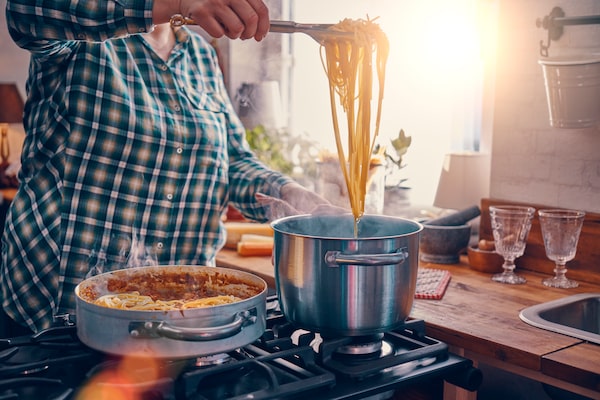
What is the right way to cook pasta?
To enjoy pasta, even on a diet, it’s all about how it is cooked and limiting the size of your portion. Don’t discard it. The Mediterranean diet is considered the best diet today and it includes pasta.
The correct way to cook it is al dente, which means “to the tooth,” so that there is some firmness to the bite. Al dente pasta is lower on the glycemic index than soft, overcooked pasta – if pasta is cooked too long, more starch is released and the body breaks it down into glucose – meaning al dente pasta doesn’t spike blood sugar as rapidly.
iStock
Pasta and sauce should be made separately. I have tried recipes for one-pan pasta and I assure you that using two pans gives you a much better result. And it takes the same amount of time.
Sauces can made ahead of time, but cooking the pasta is a last-minute event. I was recently in Positano, Italy, and chef Vincenzo Esposito of Li Galli restaurant gave me a pasta cooking lesson.
First, in a large pot, bring at least three litres of water to a boil, then add 1½ tablespoons of Kosher salt or ¾ tablespoons regular salt. When the water returns to a rolling boil, add just enough pasta for each serving: 3 ounces or 80 grams per person is considered the right amount, but some people like more. Once the pasta is in the water, stir occasionally to make sure it doesn’t stick. Cook until almost al dente. It will feel undercooked. A visual cue that you’ve done this right is a little ring of white inside the pasta where you have bitten it. Another clue is the cooking time on the package. Cook for one minute less than the lesser amount of time.
Have your sauce simmering beside your pasta pot and, with tongs, take the pasta and toss it in the sauce. Add a cup or so of pasta-cooking water and let the pasta finish cooking in the sauce. (It should be perfectly al dente after a minute or two.) This makes starches, fats and proteins confidently amalgamate together. Toss everything around, sprinkle some olive oil over and add grated cheese, if desired. Serve immediately. Pasta waits for no one.
Hungry for ooey, gooey baked pasta? Cook the pasta for about three minutes before tossing with the sauce and baking. It may seem raw, but it will be perfect after baking. Use larger thicker noodles, with ridged edges, so they don’t overcook, and the sauce has something to cling to. Avoid long noodles or fine pastas, which will become too soft. Toss in different cooked veggies (this is a good opportunity to use up leftovers), and finish with lots of cheese for the gooey texture.
For an Italian brand of pasta available in the supermarket, I like De Cecco, although many other (more expensive) brands are also good. Buy pasta that says “Made in Italy,” because it is more authentic. The pasta must be made with 100-per-cent durum wheat semolina, which is not always true here.
What’s the secret to perfect hard-boiled eggs?
Hard-boiled eggs, it seems, are a perennial kitchen problem. Overcooked, undercooked. How do you get them just right? And how do you peel them so you aren’t left with ragged, pockmarked whites?
Eggs can be white, brown, blue or freckled. Although the flavour is generally the same, the colour depends on the breed of chicken. Brown eggs, however, have slightly harder shells, making them better for boiling.

Refrigerate the eggs until two hours before you need them to let them come to room temperature – doing this ensures they will cook more evenly with less chance of the shell cracking. If you forget to take them out of the fridge, place the eggs in a bowl of warm water for 15 minutes before boiling.
The current trendy technique for hard-boiled eggs is to start them in cold water, but having tried many variations, I find that starting them in boiling water makes them much easier to peel.
Fill a pot with enough water to ensure the eggs are completely covered and bring it to a boil over high heat. Gently add your eggs with a spoon to avoid cracking the shell. If an egg floats on top and will not stay immersed, it is bad, and it should be discarded. If the egg cracks, salt the crack liberally – this will help it to seal up.
Time the eggs from the moment the water returns to a full boil. After one minute, turn the heat down a bit, and simmer vigorously for exactly 11 minutes for large eggs.
To centre the yolk for devilled eggs, gently rotate the eggs with a spoon continuously for the first minute of cooking time.
Sometimes the cooked egg white will have a “dimple” at the fat end. You can avoid this by pricking that end with a pin before you place the egg in the water.
When it comes to easy peeling, people swear by baking soda or vinegar in the water, but I find neither as effective as using an ice-water bath. Have a bowl of ice water ready (complete with ice cubes) and add the eggs immediately after they are removed from the simmering water. Remove from the ice water when cool. Tap the shell and peel the egg from the fat end. Breaking into the air space dislodges the membrane attached to the white and the shell slips off more easily. It is the shock to the eggs from the ice that makes them easier to peel.
Peeling the eggs right away also makes it easier. If you don’t want to eat them immediately, go ahead and peel them but place them in a bowl of cold water, stored in the fridge for up to 24 hours, so they don’t dry out.
People who love boiled eggs are usually particular as to the consistency of the yolk. The 11-minute cooking time I mentioned above will yield a fully cooked yolk. A three-minute large egg is runny, a four-minute egg is starting to set around the edges of the yolk and a five-minute egg has a creamy, runny centre. A six-minute egg is slightly runny and perfect for topping salads.
How do I make a softer meringue?
Soft, gooey meringues floating in a sea of custard, or a pavlova, are both unlike traditional meringues, which are crunchier and sweeter.
With all meringues, you must start with a super-clean bowl and preferably room-temperature egg whites. Use fine granulated sugar if it is available. Measure out 4 egg whites, ½ tsp salt, ½ tsp cream of tartar, 1 cup granulated sugar, 1 tbsp white vinegar and 1 tsp cornstarch. Line a baking sheet with parchment paper. If you want a perfect 8-inch or 9-inch round, draw the circle on the back of the parchment paper. Otherwise go freehand, which often looks more fun.

Olga Dubravina/iStockPhoto / Getty Images
With electric beaters, start beating the egg whites with the salt and cream of tartar until they become foamy. Slowly drizzle in the sugar, beating constantly. The egg whites should be so thick they stand in stiff peaks. Add the vinegar, then sift in the cornstarch and briefly beat it into the mixture. Using a large spoon, dollop individual meringues onto the parchment paper (I find an oval shape more attractive) or make your 9-inch round. Scoop the sides higher, as you will fill the centre of the round with fruit and cream. Bake for 75 minutes at 275 F. Turn off the oven, open the door slightly and let sit for an hour. The meringue will easily peel off the paper. Store in a cool place, in an air-tight container, for up to a week. Never refrigerate meringue, which will make it soggy. When ready to serve, fill with whipped cream, fruit, lemon curd or anything else that you love.
The other magnificent meringue is Ile Flottante, an old French dessert that I was recently served and fell in love with all over again. Very light, it is the perfect finish to a holiday dinner.
Also called Floating Islands, the meringues are poached and served on top of crème anglaise. The meringue mixture is the same as above, but without the vinegar and cornstarch. Bring a large pot of water to a simmer and spoon about ¼ cup meringue mixture into the water. Poach about 2 minutes a side, then remove with a slotted spoon and place on parchment paper. They will deflate. Make a crème anglaise – basically a custard without a thickener – then float the meringues in a pool of the cooled custard. Garnish with caramel, nut brittles or fruit. If this seems too fiddly, you can pile the meringue mixture into a lightly oiled Bundt pan, place it in a pan of hot water and bake at 375 F until puffed and golden, 20 to 25 minutes. Spectacular!
What’s the trick to perfect pastry?
Pastry is one of life’s little mysteries. It strikes fear in many people’s hearts. How do some create pastry that is crisp and flaky, while others produce tasteless cardboard?
The first rule is not to be nervous. The hands of nervous pastry makers can get warm, and heat is the bane of perfect dough. The second rule is to handle the dough lightly. If pastry is overworked, or if heat is introduced, too much gluten is developed, and the dough becomes tough.

iStock
When it comes to ingredients, use all-purpose unbleached flour, organic if you prefer. And measure accurately.
Although butter makes the best-tasting pastry, it doesn’t create that flaky, melt-in-your-mouth texture. Adding a little organic vegetable shortening gives me the texture I want. I like to use 75 per cent butter and 25 per cent shortening for savoury pastry and all-butter for desserts. Use unsalted butter, as it has less water than salted. The higher the proportion of fat used, the crispier and tastier the pastry, but more fat also makes the pastry harder to roll out, because it is so delicate. Pat out high-fat pastry instead.
The fat should be cold but not too hard; otherwise, it will not blend properly with the flour. Remove the fat from the refrigerator about an hour before using and cut into about 1.25-cm (half-inch) pieces. (For food processor recipes, the fat should be straight out of the refrigerator.)
Bind the flour and fat together using water, wine, citrus juice, beaten egg or a combination. The liquid should be ice cold. A tablespoon of white vinegar or lemon juice mixed with the water makes a flakier dough.
To make the dough, cut the fat into the flour with a pastry cutter, two knives or your fingertips until the mixture resembles coarse breadcrumbs. Sprinkle the liquid over the fat/flour mixture. You need just enough to hold the pastry together. Gather the pastry into a ball with your fingertips. It should hold together but not feel sticky.
To roll out the pastry, lightly flour the counter, as well as the top of the pastry. Flatten the dough a little by pressing with the rolling pin, and then, starting in the centre, roll gently to the edges, using light but firm strokes. Occasionally turn the pastry in a circular motion to keep it from sticking. Roll the dough about 3 mm (1/8-inch) thick, making sure it is enough to fit your pan.
When transferring the dough to the pie plate, wrap the dough gently around a lightly floured rolling pin. Place the pin over the top edge of the pie plate and unroll the pastry gently.
Roll some excess pastry into a little ball and use that to gently press the dough into the pan. This works better than your warm fingers, which can more easily tear the pastry. Make sure the dough reaches into all corners of the pan and up the sides to account for shrinkage. If the pastry tears, moisten the spot with a drop of water and patch with some extra pastry.
Freeze the pastry in its pan for 30 minutes. It bakes better when taken directly from the freezer. And always bake pastry in the lower third of the oven to make sure the bottom crust is properly cooked.
Pastry chef Lisa Sanguedolce shows you how to beautifully decorate your favourite pie
Globe and Mail Update
How do I make shortbread?
When it comes to shortbread, I have deep prejudices. I grew up in Scotland, with wonderful, crumbly, buttery shortbread. It was a treat all year round but especially at Hogmanay (New Year’s Eve), a much bigger holiday than Christmas there.
Shortbread’s history dates back at least five centuries. It was often large round discs notched at the edges to represent the rays of the sun. Scottish legend says Mary, Queen of Scots named shortbread “petticoat tails,” probably a variation of the French “petites galettes,” or small cakes.

rgbdigital/iStock
Ingredients are key to making the best shortbread. I use unsalted butter; it has less water, which makes for a superior biscuit. Giving the sugar a couple of turns in the food processor makes it finer, resulting in a better texture. I also add some organic rice flour, which helps to make a crumblier, mouth-rich shortbread. Bob’s Red Mill, available at most supermarkets, is a good brand.
The best shortbread is made by hand because it is easier to judge the dough’s texture. Butter and sugar are creamed together, then the flours, sifted together, are added slowly. If you make a larger batch, cream the butter and sugar together with an electric mixer and then beat in the flour with a wooden spoon. Brown sugar can be used, but it is not traditional.
Baking should be slow so that the sugar does not burn. If you like it crisper, bake a little longer. Shortbread takes to flavours such as ginger, chocolate chip, grated orange or lemon rind, chopped nuts or cardamom. There is never vanilla in shortbread.
My recipe has been passed down through our family, which gives a lovely sense of history and connection to the women who made it before me.
Traditional recipes call for a 3:2:1 ratio, or 3 cups flour, 2 cups butter, 1 cup sugar (processed finer). I add ½ cup rice flour for texture and a pinch of salt. The following recipe makes about 30 cookies.
Cream the butter and sugar together until creamy with an electric mixer. Gently beat in the flour until just incorporated (or use a wooden spoon, which is more traditional but harder).
The dough should be pliable and firm, but not crumbly. Divide in half and roll each half into about a ½-inch thickness on a floured board. Chill dough for 15 minutes. With a lightly floured 2-inch cookie cutter, cut out rounds. The cookies will spread so space them an inch apart. Prick each cookie all over with a fork.
Place on ungreased cookie sheets and bake in the centre of the oven at 300 F for about 25 minutes or until creamy coloured but not brown. If you like a crisper cookie, rather than a softer one, bake 5 minutes longer. If you want thicker cookies, they will take longer to bake.
Cool 5 minutes then remove to a wire rack. Sift all over with granulated sugar, if desired.
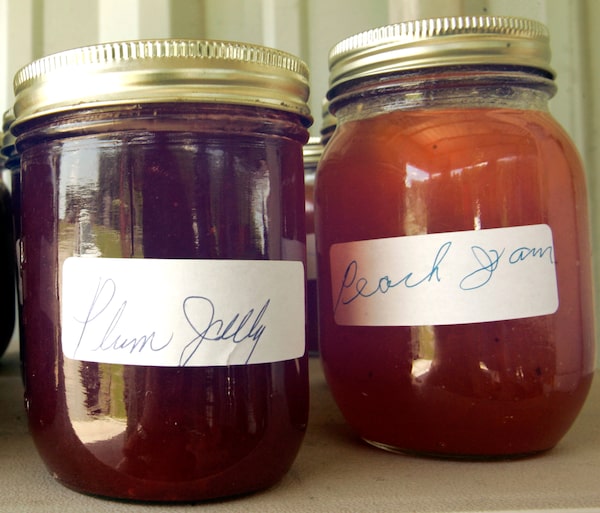
What’s the secret to a great homemade jam?
Local summer fruit is glorious. It tastes incredible eaten out of hand, and cooks beautifully, making summer desserts that are naturally sweet and satisfying. But for me, summer fruit is synonymous with jam. I make many different kinds and look lovingly at them until fall, when I open them up to relive those marvellous tastes.
Jam is easy to make and these tips will help you produce wonderful preserves.
Danny Johnston/AP
Pectin is a natural gelling agent found in the skins/peels and seeds of fruit. I do not like using store-bought pectin. It makes jams taste dull. Instead, I add high-pectin citrus, such as lemon or lime juice, or use a high-pectin fruit along with one that is low. A great combination is strawberry and grated apple, or raspberry and lime. My other, easier solution: Add half a grated tart apple with skin to 4 cups of fruit.
Use underripe fruit, if possible, as it contains more acid and will set better. Lemon or lime juice will help with setting and will also offer pectin. Squeeze the juice of a lemon into 6 cups of chopped fruit. Sometimes I also thinly slice a lime or lemon and add to the uncooked mixture. When the jam is cooked and cooled, I chop up the slices and return them.
Keep the sugar down. Old recipes call for equal amounts of sugar and fruit. Today a ratio of 150 to 200 grams of sugar to 300 grams fruit (about 1 cup of sugar to every 2 cups of fruit) works, but bear in mind it will be a softer set.
Use a wide pan with a heavy base and heat the sugar and fruit together gently until the sugar dissolves, then turn up the heat to high. Boil the jam, stirring occasionally. Skim the foam with a slotted spoon, then stir in about 1 tbsp butter, which helps to remove any residue. Jam sets at 220 F (105 C). A good thermometer saves time and failure. If you don’t have one, chill some saucers and drizzle over a spoonful of jam when you think it is set. You’ll know the jam has set if the sides crinkle when you draw a knife through it.
Let the jam sit for 20 minutes, then ladle into the warm jars, filling to just below the top. As I am essentially lazy, I put my jars through the dishwasher without soap and fill them while they are still warm, instead of sterilizing them in a hot water bath. Once full, screw on the lid and refrigerate. I keep them refrigerated for up to a year.
There are many options for flavouring jam, so be imaginative. Ginger, rosemary, thyme, pepper, chili, star anise and sage all add a different dimension. Add these ingredients if you like with the sugar and fruit before cooking. For another take, add liqueurs or spirits to each individual jar.
To finish, label with the name of the jam and the year. This takes the surprise out of opening your jars.
You can make your own pectin. Slowly simmer a large bottle of apple cider, preferably organic, on the stove until it becomes jelly-like, about 1 1/2 hours (220 F on an instant read thermometer). The result: apple jelly or pectin. I add about 2 tbsp of homemade pectin to 3 cups of fruit, if the fruit is low in pectin, as an alternative to lemon juice or grated apple.
How do I quick pickle vegetables?
Thirty years ago, my mother made her superb zucchini pickles using a quick pickling method, which no one else bought into back then. Real pickling was (and is) a labour-intensive process – sterilizing jars, canning in water and keeping the finished product for a year on the shelf – but Mum just poured a brine over zucchini and left them in a bowl. She was always ahead of her time.
Today, quick pickles are popping up everywhere. I use them as a condiment because they add acidity and crunch. I toss them into salads, serve them with Indian and Japanese food, snack on them and chop them up as a garnish scattered over barbecued meats and fish. As a soup garnish, they are quite wonderful.
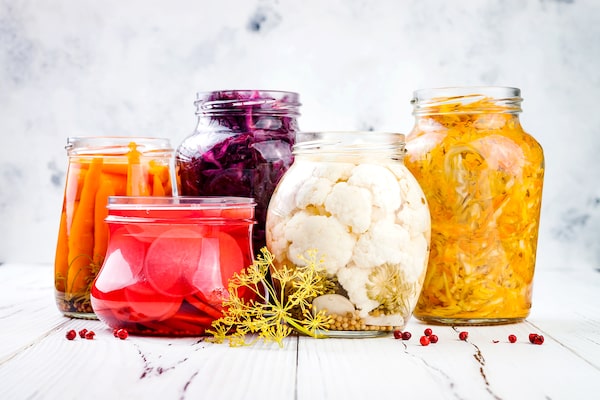
sveta_zarzamora
The secret to quick pickling is the ratio of vinegar to water, and the amount of sugar and salt. The more vinegar, the more acidic the pickles. More sugar means a sweeter pickle. As for added spices, there is a whole world out there.
Use fresh unblemished vegetables. Cucumbers are most popular. Buy mini cucumbers, especially the Persian ones. They should be very firm. When pickled, a slightly soft cucumber never has the crunch you want. My favourite pickles are radishes, baby turnips, onions, tiny cherry tomatoes, cauliflower, garlic, ginger, carrots and daikon radish, but you can pickle any vegetable. If I do green beans, I blanch them for a minute then toss them into ice water, so they retain their colour.
I use either rice vinegar or apple cider vinegar as I prefer a mellower taste. White vinegar and wine vinegar work, too, but tend to make for a sharper pickle.
Combine equal amounts of vinegar and water (about 1 cup each) with 1 tbsp Kosher salt and 1 tbsp sugar for about 6 cups vegetables. The sugar is optional, but I prefer to use it. Just remember, the more vinegar, the more acidic the pickles; the more sugar, the sweeter.
The flavourings can change with each batch. My favourites include star anise, togarashi (Japanese peppers), coriander seeds, peppercorns, bay leaves, fennel seeds, cumin seeds, thinly sliced garlic and ginger. Dried chilies or chili flakes add spiciness; herbs to try include dill, tarragon and oregano.
Slice your veggies in the best shape for each – cucumber and radish rounds or carrot batons for example – and place them in a big bowl. Bring your pickling liquid to a boil for 2 minutes, and then pour it over the vegetables. If they are not quite covered, press them down a little. Leave on the counter to cool. When cold, store as I do in a big glass container or in glass jars in the fridge.
If you are giving them away, write on the label that they should be kept refrigerated. They last a couple of months, although a week is about my record.
How do I brew coffee sous vide?
I’ve never really liked coffee. I find it too bitter, dark and almost murky. Despite trying the range of brewing methods, roasting techniques and carefully sourced beans that have captured the palates of most people I know, to the point of addiction, tea has always been my preferred beverage.
But earlier this year, I had an excellent 12-course meal at Ox, one of the newest restaurants in Reykjavik, Iceland. The meal finished with chocolates and coffee made sous vide, and I couldn’t believe the difference produced by this unusual brewing method. The flavours were textured, fruity and smooth, with no bitterness at all.

Unsplash
Owing to my disinterest in coffee, I haven’t had much experience in formulating the perfect brew, so I consulted Javaid Shah at Phil & Sebastian in Calgary, one of the best roasters in Canada. Phil & Sebastian’s head trainer and last year’s Canadian Brewers Cup champion, Shah has made a living out of tinkering with coffee.
Hot water can very easily over-extract flavours in coffee. “The difference between ‘sweet and balanced’ and ‘bitter and unpleasant’ is sometimes only a matter of seconds,” Shah says.
In contrast, sous vide is more forgiving. “It allows enough heat to extract rich, sweet complex flavours from the coffee, but keeps the temperature below the point of introducing bitterness.”
To make sous vide coffee, follow Shah’s method: Combine ⅔ cup (52 grams) of coarsely ground coffee with 3 cups (750 grams) of room-temperature, filtered water in a one-litre Mason jar and stir to mix. Screw on the lid until snug. This allows hot air to escape without letting water in, preventing the jar from cracking or even exploding. Brew in a 68 C (154 F) hot water bath for two hours (we used both a Sansaire immersion circulator and a Sous Vide Supreme machine for the trials), then strain through a coffee filter. The conclusion for me, the non-coffee drinker, was that I preferred a medium-roast coffee rather than a dark one, as I found the dark still a bit bitter. The medium roast allowed for more flavours to come through. My testers (who do drink coffee regularly) loved both kinds.
Would you go to this trouble? It certainly is a talking point at a dinner party, and it is interesting to see people’s reactions. Most people say they would never do it, preferring the French press method. But if you have a sous vide, you might find it addictive.
Reheat on top of the stove when you need it or serve over ice or with cream. It keeps sealed in the Mason jar in the fridge for up to one week.
What’s the trick to a perfect cup of tea?
I am a tea jenny, an old Scottish phrase that means I am a tea addict and very fussy about how my tea is made. (Growing up in Scotland, you drank either tea or whisky, and I was too young for the whisky.) My mother had a wood-burning fireplace in the kitchen, and the tea pot constantly sat by the flame. Tea leaves were thrown in and water was added all day. It made for a strong drink.
Coming to Canada was a shock to the system for us tea drinkers. People threw a tea bag into a cup and poured water over it. What a disaster: No taste and the tea cooled off in a minute. Now it has changed for the better in Canada, but the United States lags behind – tea does not have the respect there that coffee does.

rimglow/Getty Images/iStockphoto
So how do you make a proper cup of tea? First you need a kettle and a good clay or ceramic teapot, which has the best heat retention. For better flavour, warm the pot with some boiling water and discard. The pot is now ready for you to add your tea and more boiling water.
For black teas, the water must be boiling to extract the essence of the tea. Hot water dispensers and not-quite-boiling water do not cut it. Green tea, however, needs a slightly lower temperature to ensure that it does not taste bitter; the perfect water temperature for this variety is 190 F. As for white tea, a slightly lower temperature is needed again, around 180 F; boiling water will kill the delicate taste.
Once the water has reached the correct temperature, immediately pour it over the tea bags or loose tea in a strainer in the teapot. Let it sit for four to five minutes for strong tea, three minutes for a weaker version.
Serve tea only in china cups or mugs, as other materials mute the taste. Plastic or paper cups are the worst.
As for milk, we were brought up adding it first, as it mixed better with the tea and cooled the tea slightly so as not to crack the china teacups. However, I noticed in Downton Abbey – authority of all things English – they poured in the milk afterward. Both are correct.
What tea to drink? I like a good black tea, such as English or Irish Breakfast, Assam or Darjeeling. Pu’erh, a fermented tea from Yunnan province in China, is supposed to be the best tea in the world. It commands a very high price for an aged version, which supposedly provides many health benefits.
Another trick to always brewing a perfect cup: Consider buying a kettle that has temperature settings for different teas – you will never go wrong.
How do I load the dishwasher properly?
My husband always reloads the dishwasher after I do it. He maintains he has a better sense of space. Checking with friends, many have heard the same putdown from their partners. I think I load a dishwasher correctly, but after perusing advice online and reading my own machine’s manual, I realize neither of us does it right.
First off, don’t bother rinsing your dishes. It wastes time, effort and water. Just scrape off the mucky stuff and load. Jams, sauces, ketchup and the like will rinse off. Remove clumps of food that are larger than a dime as they can clog the drain.

AlexRaths
Don’t put large pans or dishes by the door. This can prevent the washing arm from spinning properly and the detergent drawer from opening.
Load plates and larger items on the bottom rack. Smaller items, such as glasses and bowls, go on the top. Make sure that mugs, bowls and pots are facing down so that the water will flow out, but don’t hang them on the spokes – place between them, otherwise they bounce around.
Knives should be loaded handle up to prevent cutting yourself, but forks and spoons go handle down for more efficient cleaning. Mix up the cutlery so it doesn’t nestle together. Keep silver and stainless steel apart as it might produce a reaction where the silver will pit if they touch. My mother believed that putting a little ball of aluminum foil in with the silver kept it cleaner, and it certainly seems to.
Don’t overload the dishwasher as this affects the flow of the water. There should be space between the dishes to allow water to circulate. Better to do two loads.
Always check that the washer arm is free to spin. That is the biggest issue in dishwashing. If it does not spin, it will not clean.
Never put good-quality knives or anything wooden in the dishwasher. The knives will blunt quickly, and wood will end up splitting or cracking. Don’t machine wash bronze or copper either, as the heat and detergent will harm the metal.
I don’t put any pots and pans in the dishwasher as they take up a lot of room and are easier to hand wash. If you prefer to, stainless steel and aluminum should be fine, but check the manufacturer’s booklet first. The jury is out on non-stick pans; I wash by hand, but some manufacturers say they are dishwasher-safe.
Is rinse aid needed? It is full of chemicals that help your dishes to dry more quickly, but I don’t think we need more chemicals. And today’s dishwasher pods already contain a rinse aid, so if you are using them, don’t add more.
When it comes to loading the dishwasher, however, I have stopped arguing with my husband. I just let him do it.


 Lucy Waverman